Table of Contents
- Overview
- Opening a New Estimate
- Title, Type, and Customer
- Estimate Details
- Adding Items and Services
- Totals and Margin
- Billing Options
- Terms and Notes Visible for Customer
- Photos and Documents
- Internal Notes
- Custom Fields
- Saving the Estimate
Overview
You can send estimates to your customers to let them know how much you’ll charge for your services. Customers can then approve, decline, or ask for changes on your estimates.
Opening a New Estimate
Click Finances, then click Estimates in the menu. On the Estimates page, click the green “+ New Estimate” button.
Title, Type, and Customer
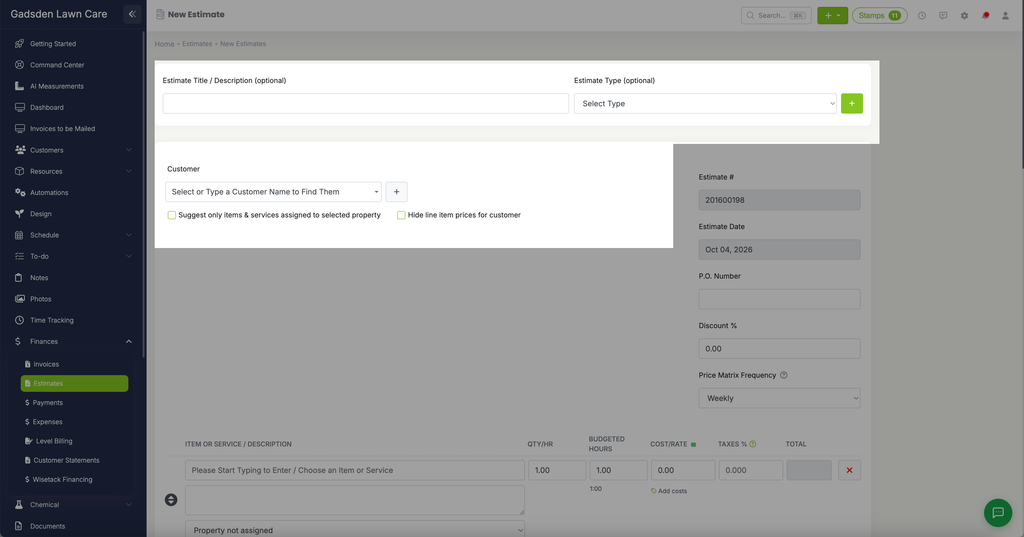
- Estimate Title / Description (optional)
- Estimate Type (optional) — choose from your existing types, or click the green + to add a new one.
- Customer — select or type a customer name. Click the + next to it to add a new customer on the fly.
- “Suggest only items & services assigned to selected property” — when checked, the items/services search only suggests what’s already assigned to that property.
- “Hide line item prices for customer” — hides the per-line prices on the customer-facing estimate, showing only the total.
Estimate Details
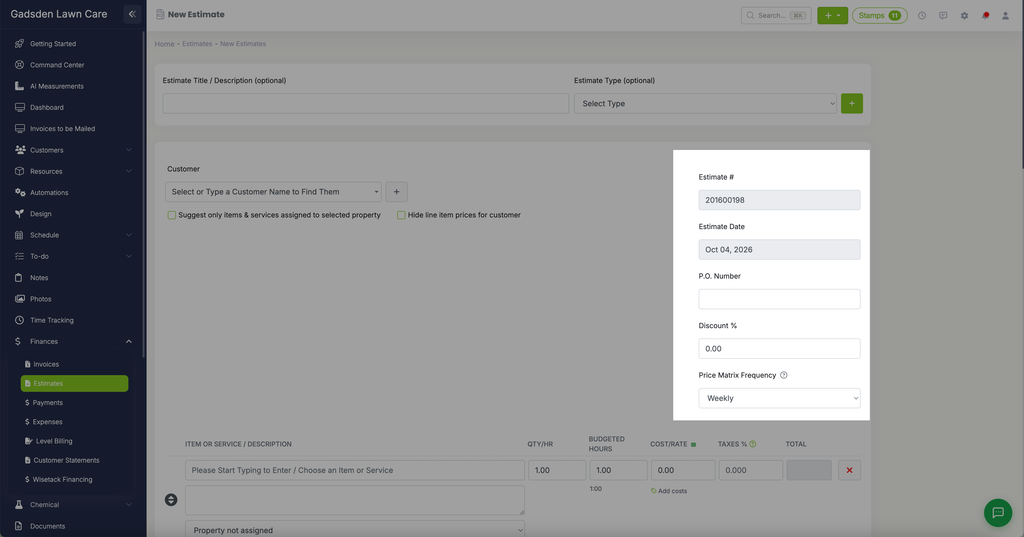
On the right side of the page:
- Estimate # — assigned automatically
- Estimate Date
- P.O. Number
- Discount %
- Price Matrix Frequency — if any of your services use Price Matrix pricing, this sets which frequency (Weekly, Biweekly, Monthly, or One-Time) is used to calculate the suggested price for this estimate, since Price Matrix applies a markup based on how often you’ll be visiting.
Adding Items and Services
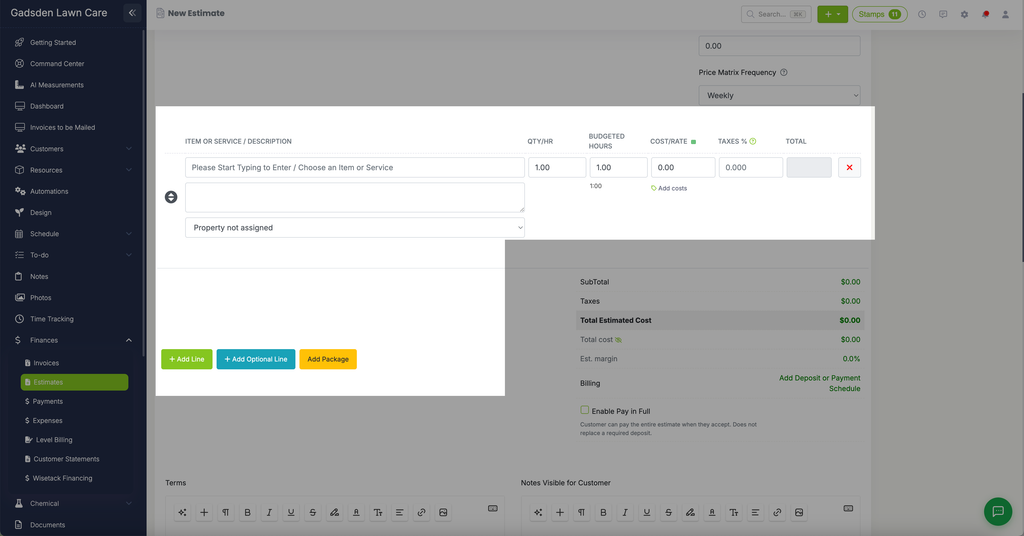
Start typing in the “Item or Service / Description” box to find and add your existing items and services. Each line shows:
- Qty/Hr
- Budgeted Hours
- Cost/Rate — if the service has Price Matrix pricing set up, this is calculated based on the property’s lawn size, difficulty, and the Price Matrix Frequency above. In Suggest mode, a badge appears next to the field showing the calculated price — click it to apply. In Auto-Fill mode, it fills in automatically. You can always type over it manually.
- Taxes %
- Total
Click “Add costs” under a line to add additional costs to it. Click the red X to delete a line.
Assign a Property to the estimate using the dropdown — it defaults to “Property not assigned.”
Use the buttons below the items table to add more:
- “+ Add Line” — add a standard line item
- “+ Add Optional Line” — add a line the customer can choose to include or exclude
- “Add Package” — add a package of items at once
Totals and Margin
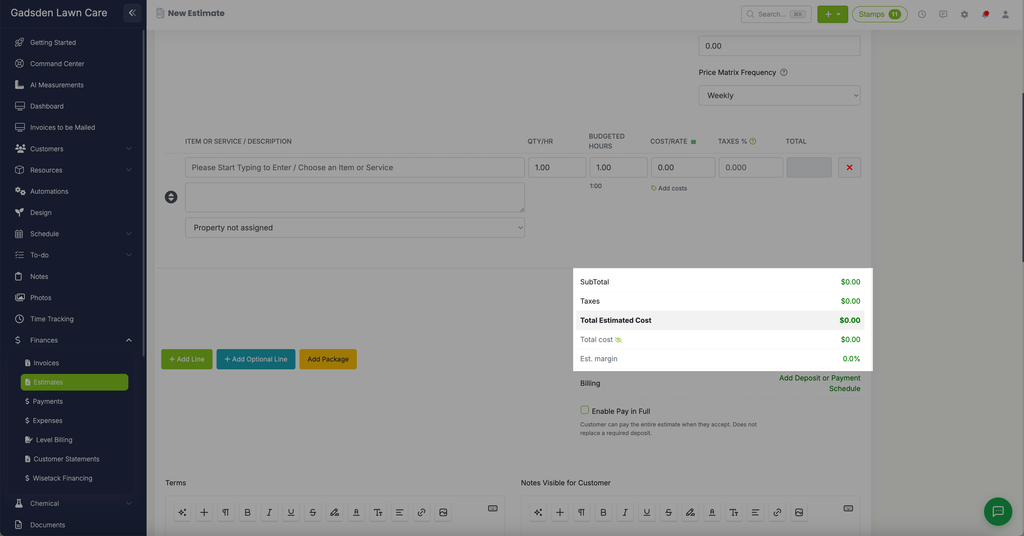
As you add items, the right side updates with:
- SubTotal
- Taxes
- Total Estimated Cost
- Total cost — your internal cost (hidden from the customer)
- Est. margin
Billing Options
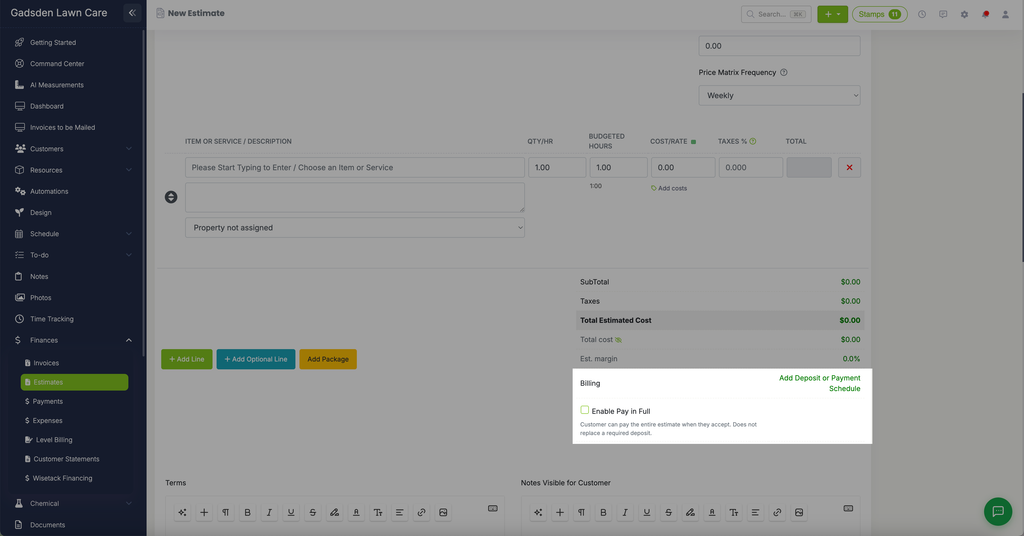
- “Add Deposit or Payment Schedule” — link to set up a deposit requirement or payment schedule for this estimate.
- “Enable Pay in Full” — lets the customer pay the entire estimate when they accept it. This does not replace a required deposit.
Terms and Notes Visible for Customer
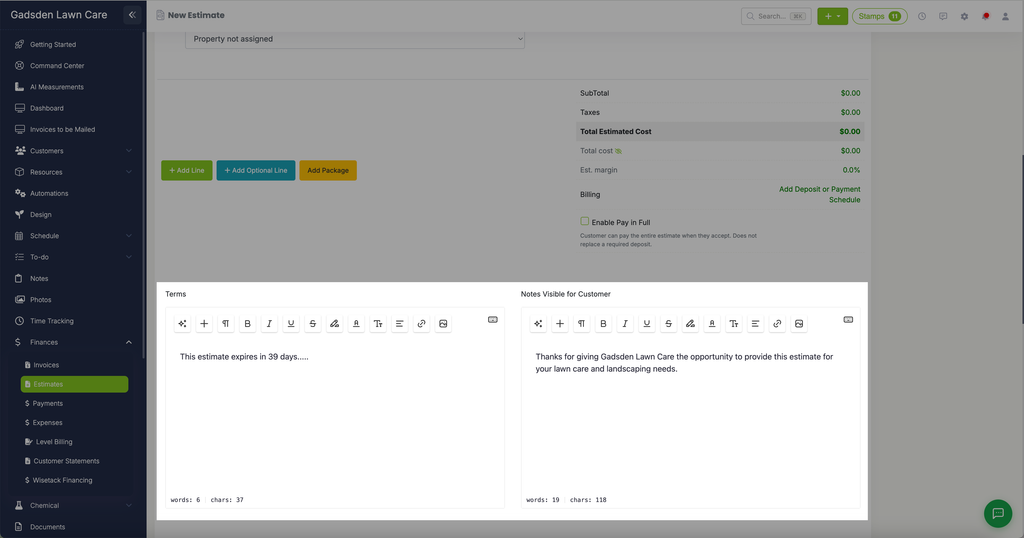
- Terms — your terms and conditions for the estimate. Defaults to the message set in your Invoice & Estimate Settings (for example, “This estimate expires in 39 days…”).
- Notes Visible for Customer — a message the customer will see on the estimate. Also defaults from your Invoice & Estimate Settings.
Both fields use a rich text editor and show a live word/character count.
Photos and Documents
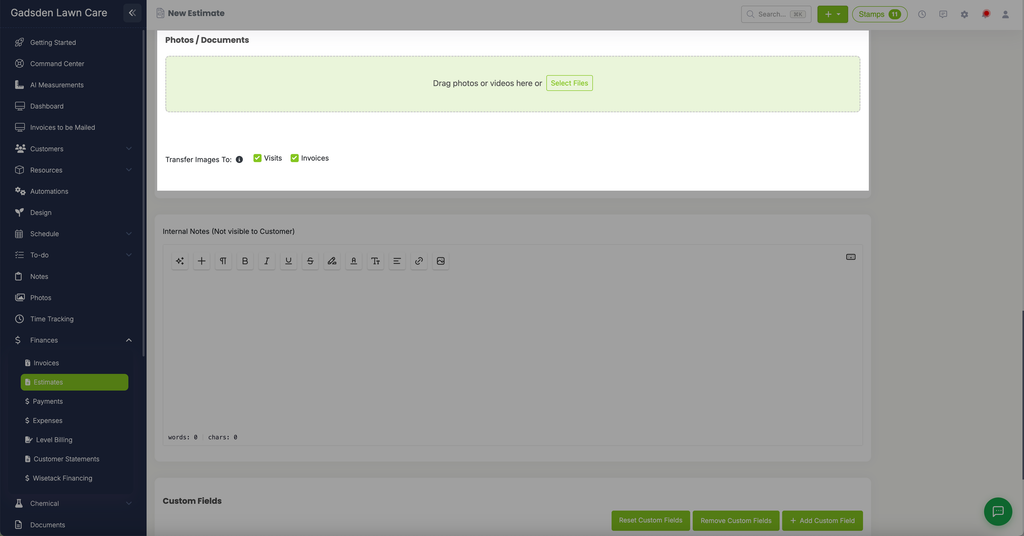
Drag photos or videos into the upload area, or click “Select Files.” Choose where uploaded images should transfer to using “Transfer Images To:” — Visits and/or Invoices (both checked by default). Hover the i icon for more detail.
Internal Notes
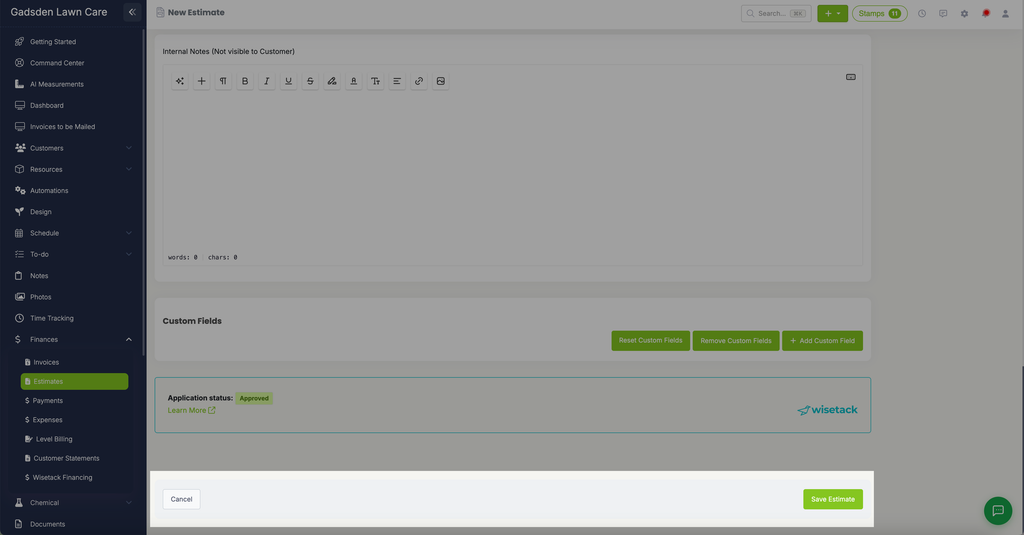
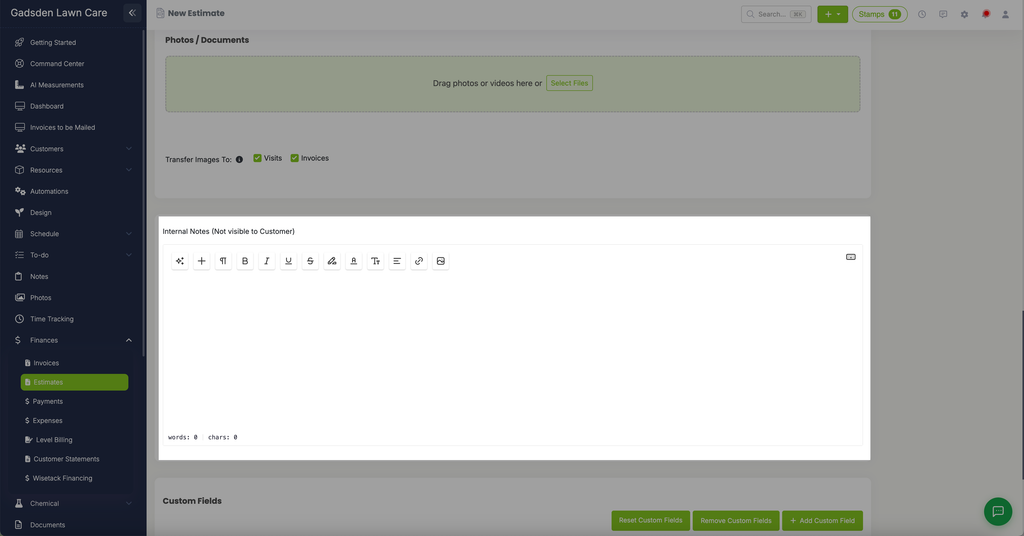
Add “Internal Notes (Not visible to Customer)” for your team. These notes never show to the customer.
Custom Fields
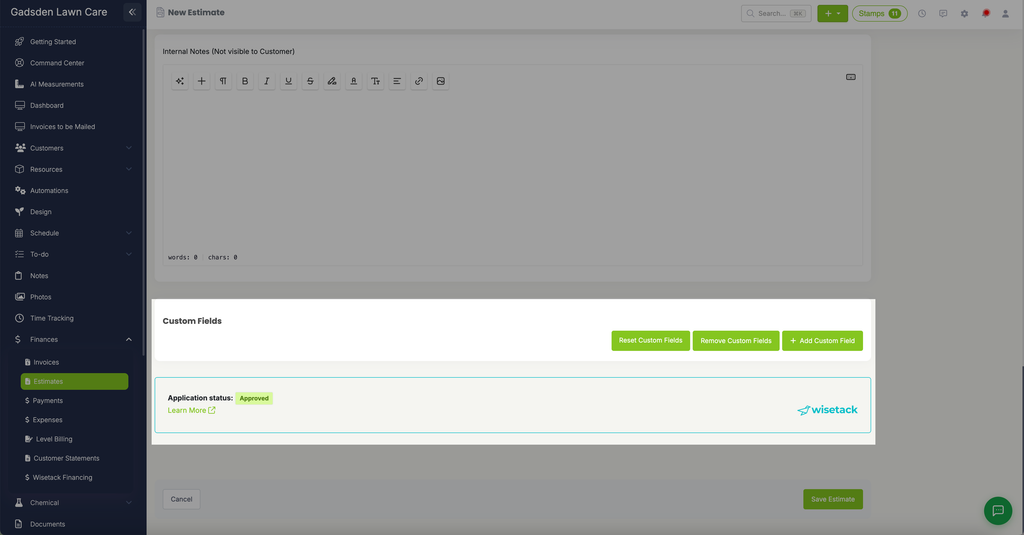
Use “Reset Custom Fields,” “Remove Custom Fields,” or “+ Add Custom Field” to manage any custom fields on the estimate.
If your account uses Wisetack Financing, you’ll also see your application status (for example, “Approved”) near the bottom of the page.
Saving the Estimate
Click the green “Save Estimate” button to create the estimate, or “Cancel” to back out.