Table of Contents
- Overview
- Opening Quick Dispatch
- Step 1: Load Properties
- Step 2: Add Services to Properties
- Step 3: Assign Employees to Properties
- Step 4: Select Date and Time
- Adding the Visits to Your Schedule
Overview
Once you’ve created a Quick Dispatch Template, use the Quick Dispatch page to actually load it and add its visits to your schedule.
Opening Quick Dispatch
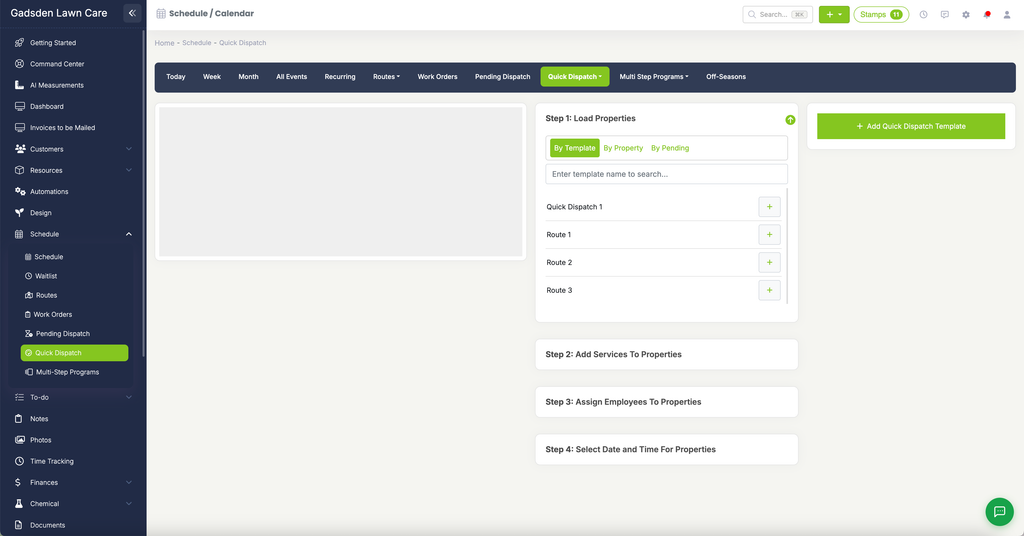
Click the Schedule tab, then click Quick Dispatch > Quick Dispatch (not Quick Dispatch Templates, which is for building templates).
Step 1: Load Properties
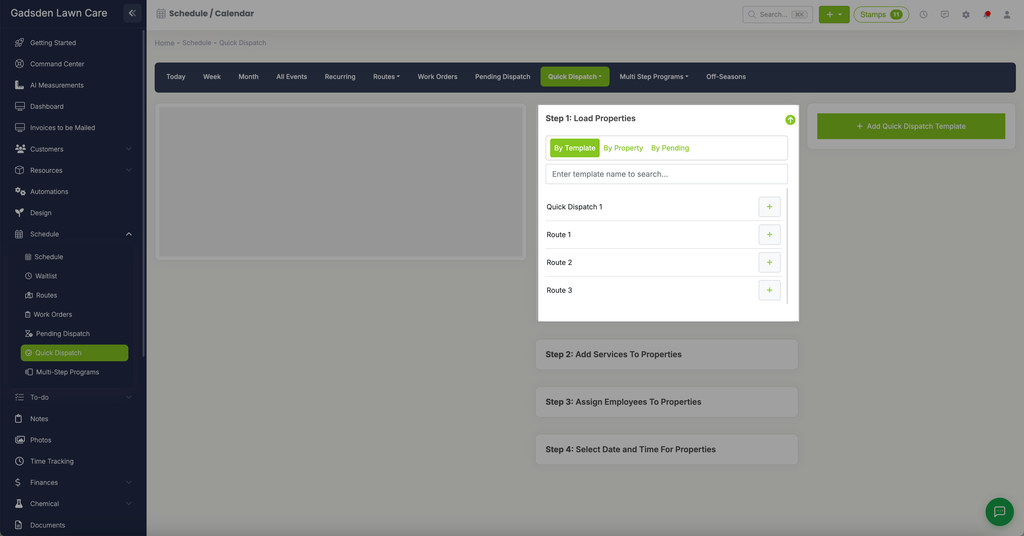
Choose how you want to load properties into this dispatch:
- By Template — search for and select a saved Quick Dispatch Template, then click the + button next to it to load its properties.
- By Property — load individual properties directly, without using a saved template.
- By Pending — load properties from Pending Dispatch.
Click “+ Add Quick Dispatch Template” in the top right if you need to create a new template on the fly.
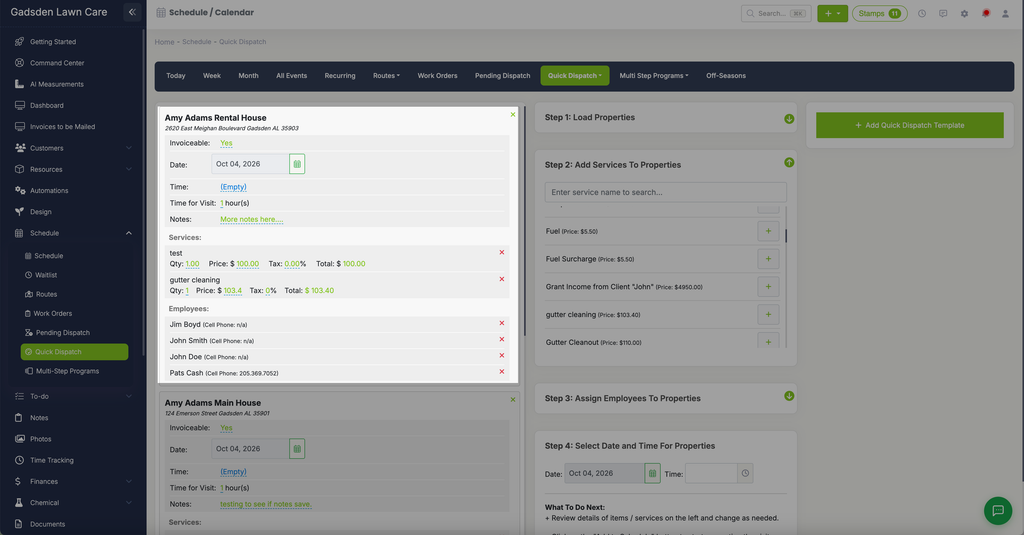
Once loaded, each property appears as its own card on the left, with Invoiceable, Date, Time, Time for Visit, Notes, Services, and Employees — all editable per property. Click the X in the top right of a card to remove that property from the dispatch.
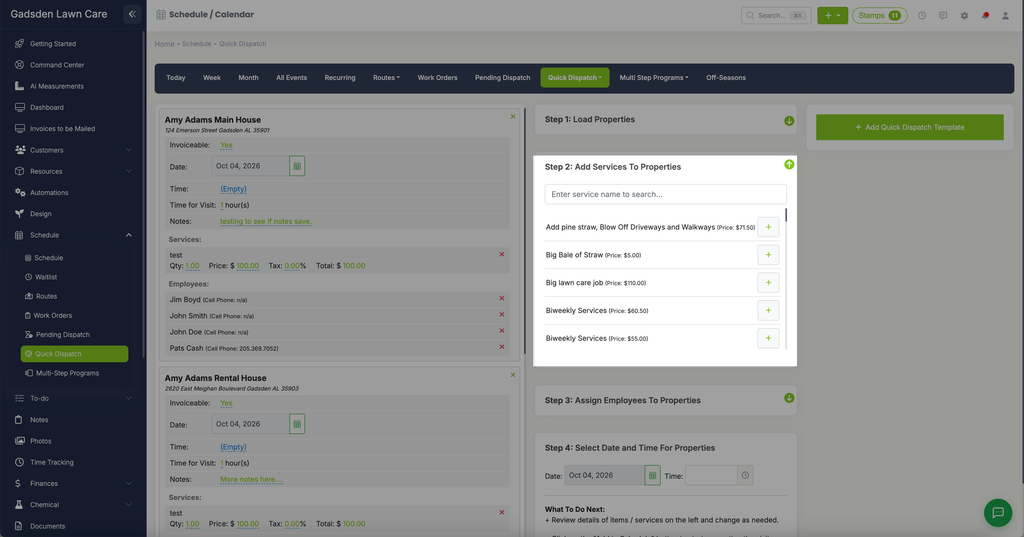
Step 2: Add Services to Properties
Click into “Step 2: Add Services To Properties” to search for a service by name and click the + button next to it to add it to your properties.
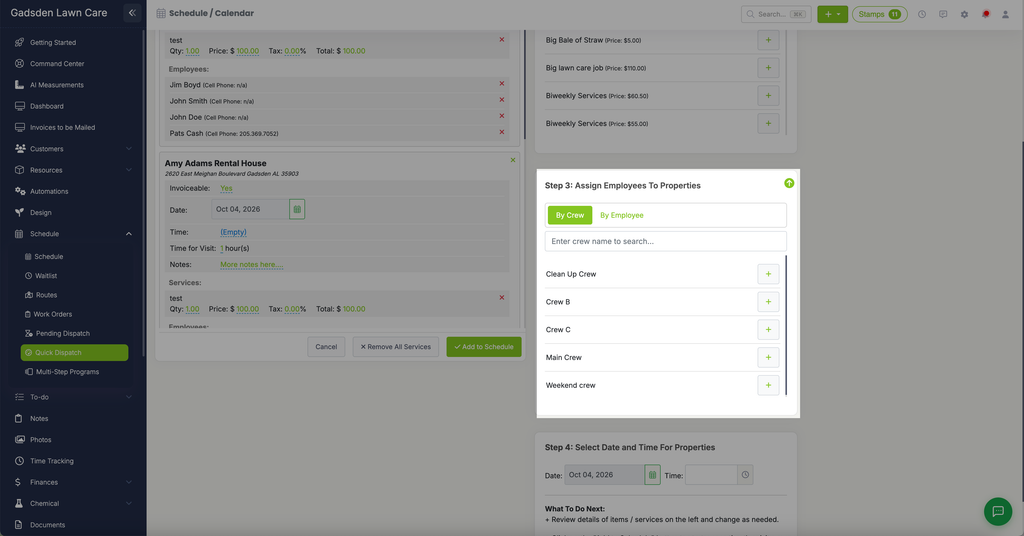
Step 3: Assign Employees to Properties
Click into “Step 3: Assign Employees To Properties” to assign employees or crews to the visits — likely the same search-and-add pattern as Step 2, though this hasn’t been directly confirmed.
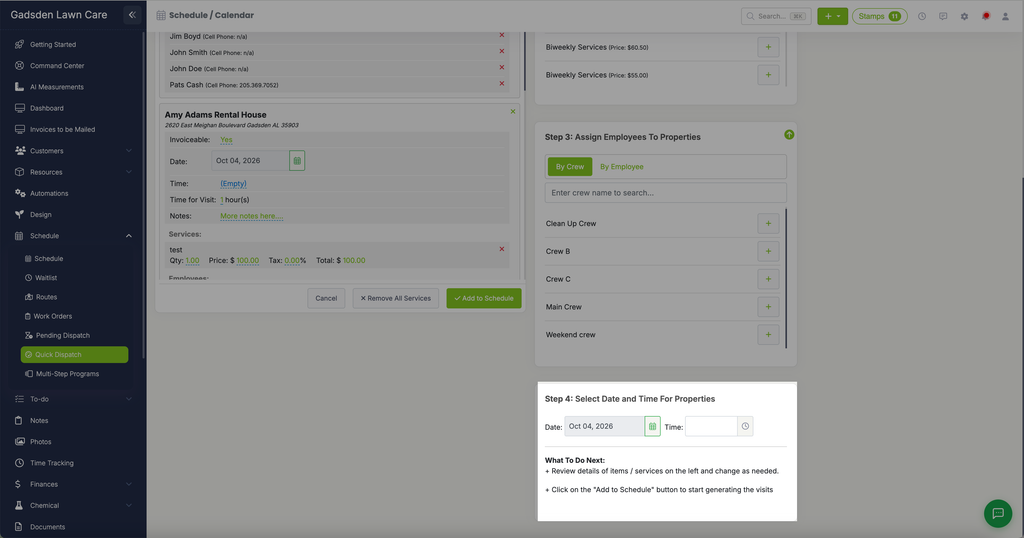
Step 4: Select Date and Time
Click into “Step 4: Select Date and Time For Properties” and set a Date and Time to apply to all loaded properties at once. You can still adjust the Date and Time on an individual property’s card afterward if one needs to be different.
Under “What To Do Next” you’ll see a short reminder:
- Review details of items/services on the left and change as needed.
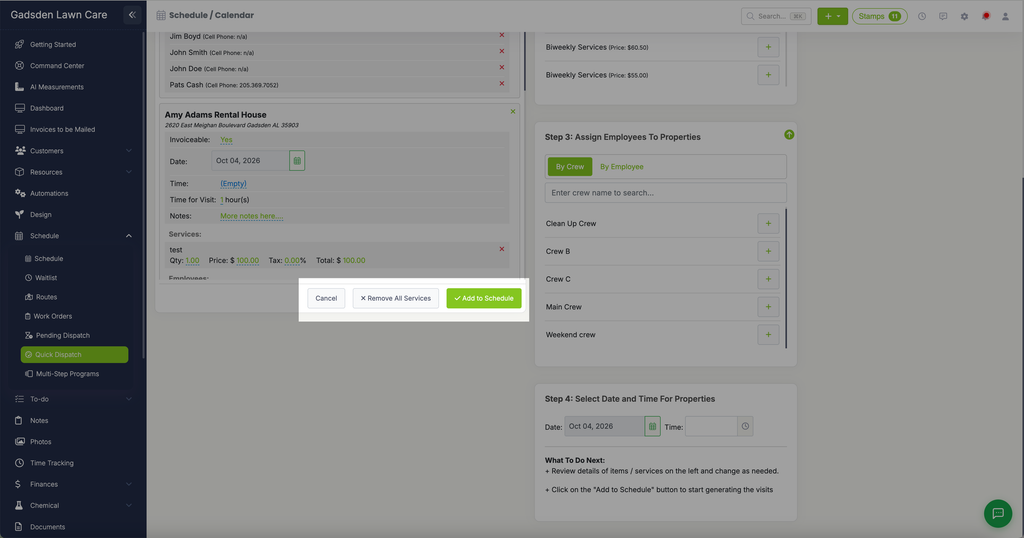
- Click the “Add to Schedule” button to start servicing these visits.
Adding the Visits to Your Schedule
Once everything looks right, click the green “Add to Schedule” button to dispatch these visits.