Table of Contents
Overview
Sometimes you may need to mark a visit as “Not Serviced” due to weather, the customer canceling, etc.
Marking a Visit as Not Serviced
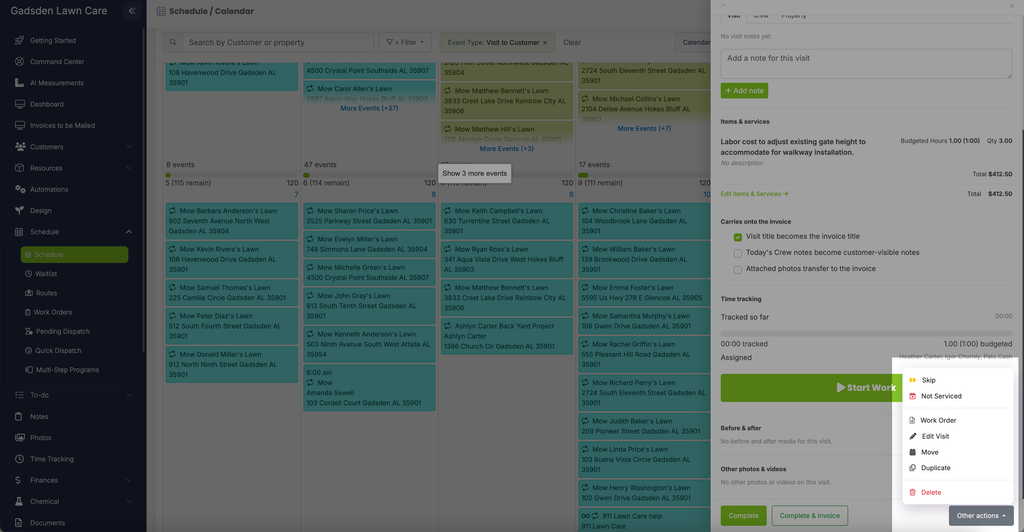
While on the schedule screen, click the open visit you want to mark as “Not Serviced.” This opens the visit’s details panel. Scroll down and click “Other actions,” then choose “Not Serviced” from the menu.
Entering a Reason
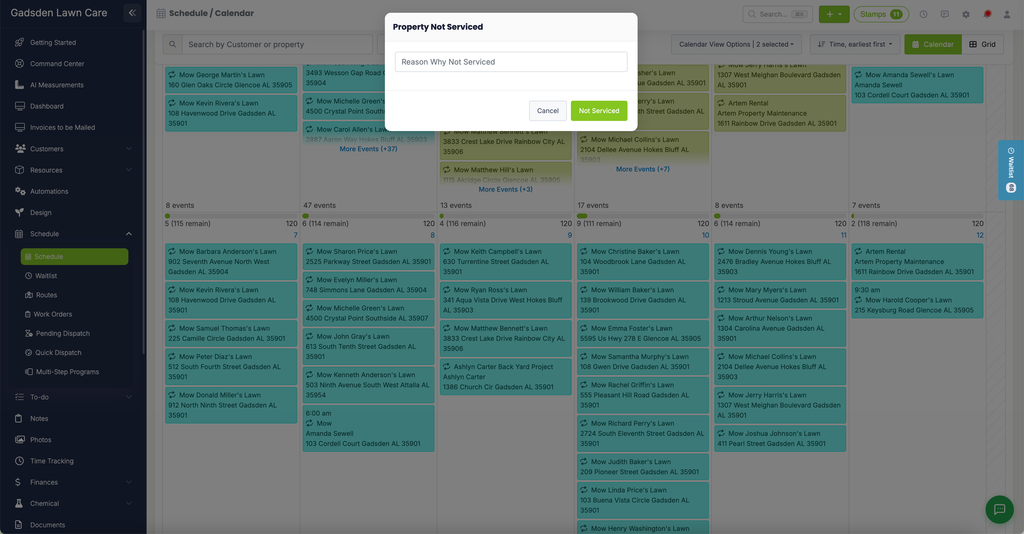
A “Property Not Serviced” popup appears, asking for a “Reason Why Not Serviced.” Enter the reason, then click the green “Not Serviced” button to save it, or “Cancel” to back out.
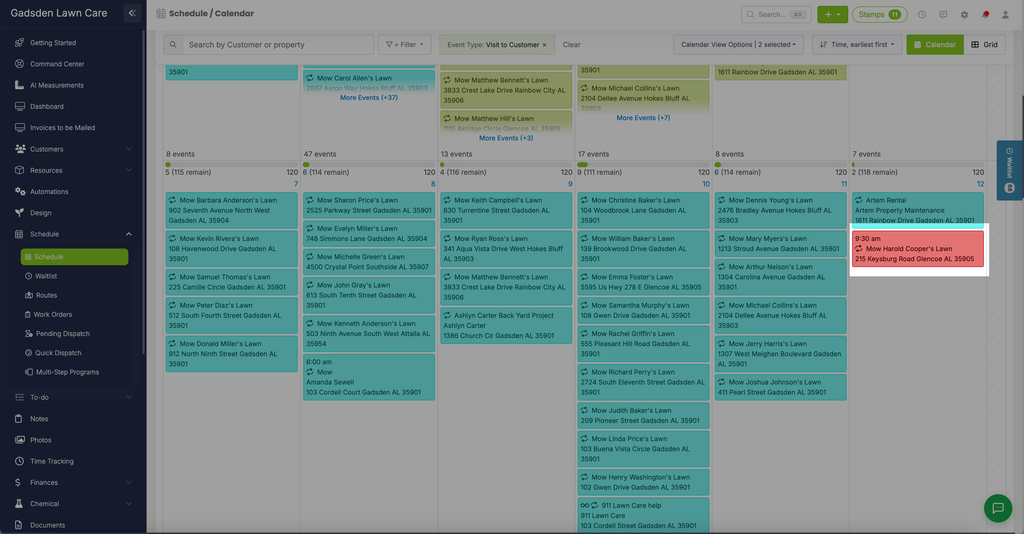
The visit is marked in red on your schedule so you can easily see visits marked as “Not Serviced.”
Notifications
You can also turn on an automation to notify the company owner, property owner, employee, etc. when a property is marked as not serviced. Learn more about automations.